4. Connect your queries to your UI
Now that your app can execute queries against a GraphQL server, you can reflect the results of those queries in your UI.
Remove boilerplate code
In MasterViewController.swift, delete the following pieces of boilerplate code that the app doesn't need:
- The
objectsproperty - Everything in
viewDidLoadexcept thesuper.viewDidLoad()call - The entire
insertNewObject()method - The contents of
prepare(for segue:)(but not the method itself) - The entire
tableView(_, canEditRowAt:)method - The entire
tableView(_, commit:, forRowAt:)method
Add query fields
Now let's add properties to display the results of the LaunchListQuery you built in the previous tutorial step.
At the top of MasterViewController.swift, add a new property to store the launches that the query returns:
var launches = [LaunchListQuery.Data.Launch.Launch]()Why the long name? Each query returns its own nested object structure to ensure that when you use the result of a particular query, you can't ask for a property that isn't present. Because this screen will be populated by the results of the LaunchListQuery, you need to display subtypes of that particular query.
Next, add an enum that helps handle dealing with sections (we'll add items to the enum later):
enum ListSection: Int, CaseIterable {
  case launches
}
Fill in required methods
Now we can update the various UITableViewDataSource methods to use the result of our query.
For numberOfSections(in:), you can use the allCases property from CaseIterable to provide the appropriate number of sections:
override func numberOfSections(in tableView: UITableView) -> Int {
  return ListSection.allCases.count
}
For tableView(_:numberOfRowsInSection:), you can try instantiating a ListSection enum object. If it doesn't work, that's an invalid section, and if it does, you can switch directly on the result. In this case, you'll want to return the count of launches:
override func tableView(_ tableView: UITableView, numberOfRowsInSection section: Int) -> Int {
  guard let listSection = ListSection(rawValue: section) else {
    assertionFailure("Invalid section")
    return 0
  }

  switch listSection {
  case .launches:
    return self.launches.count
  }
}
For tableView(_:cellForRowAt:), you can use the existing cell dequeueing mechansim, the same section check as in tableView(_:numberOfRowsInSection), and then configure the cell based on what section it's in.
For this initial section, grab a launch out of the launches array at the index of indexPath.row, and update the textLabel to display the launch site:
override func tableView(_ tableView: UITableView, cellForRowAt indexPath: IndexPath) -> UITableViewCell {
  let cell = tableView.dequeueReusableCell(withIdentifier: "Cell", for: indexPath)

  guard let listSection = ListSection(rawValue: indexPath.section) else {
    assertionFailure("Invalid section")
    return cell
  }

  switch listSection {
  case .launches:
    let launch = self.launches[indexPath.row]
    cell.textLabel?.text = launch.site
  }

  return cell
}
Your table view has all the information it needs to populate itself when the launches array has contents. Now it's time to actually get those contents from the server.
First, add a method for showing errors at the end of your file:
private func showErrorAlert(title: String, message: String) {
  let alert = UIAlertController(title: title,
                                message: message,
                                preferredStyle: .alert)
  alert.addAction(UIAlertAction(title: "OK", style: .default))
  self.present(alert, animated: true)
}
Next, add a method to load the launches. You'll use a setup similar to the one you used to set this up in the AppDelegate earlier.
However, you need to make sure that a call doesn't try to call back and use elements that are no longer there, so you'll check to make sure that the MasterViewController hasn't been deallocated out from under you by passing in [weak self] and unwrapping self before proceeding with updating the UI:
private func loadLaunches() {
  Network.shared.apollo
    .fetch(query: LaunchListQuery()) { [weak self] result in

      guard let self = self else {
        return
      }

      defer {
        self.tableView.reloadData()
      }

      switch result {
      case .success(let graphQLResult):
        // TODO
      case .failure(let error):
        self.showErrorAlert(title: "Network Error",
                            message: error.localizedDescription)
      }
  }
}
GraphQLResult has both a data property and an errors property. This is because GraphQL allows partial data to be returned if it's non-null.
In the example we're working with now, we could theoretically obtain a list of launches, and then an error stating that a launch with a particular ID could not be constructed.
This is why when you get a GraphQLResult, you generally want to check both the data property (to display any results you got from the server) and the errors property (to try to handle any errors you received from the server).
Replace the // TODO in the code above with the following code to handle both data and errors:
if let launchConnection = graphQLResult.data?.launches {
  self.launches.append(contentsOf: launchConnection.launches.compactMap { $0 })
}

if let errors = graphQLResult.errors {
  let message = errors
        .map { $0.localizedDescription }
        .joined(separator: "\n")
  self.showErrorAlert(title: "GraphQL Error(s)",
                      message: message)
}
Finally, you need to actually call the method you just added to kick off the call to the network when the view is first loaded. Update your viewDidLoad to also call loadLaunches:
override func viewDidLoad() {
super.viewDidLoad()
self.loadLaunches()
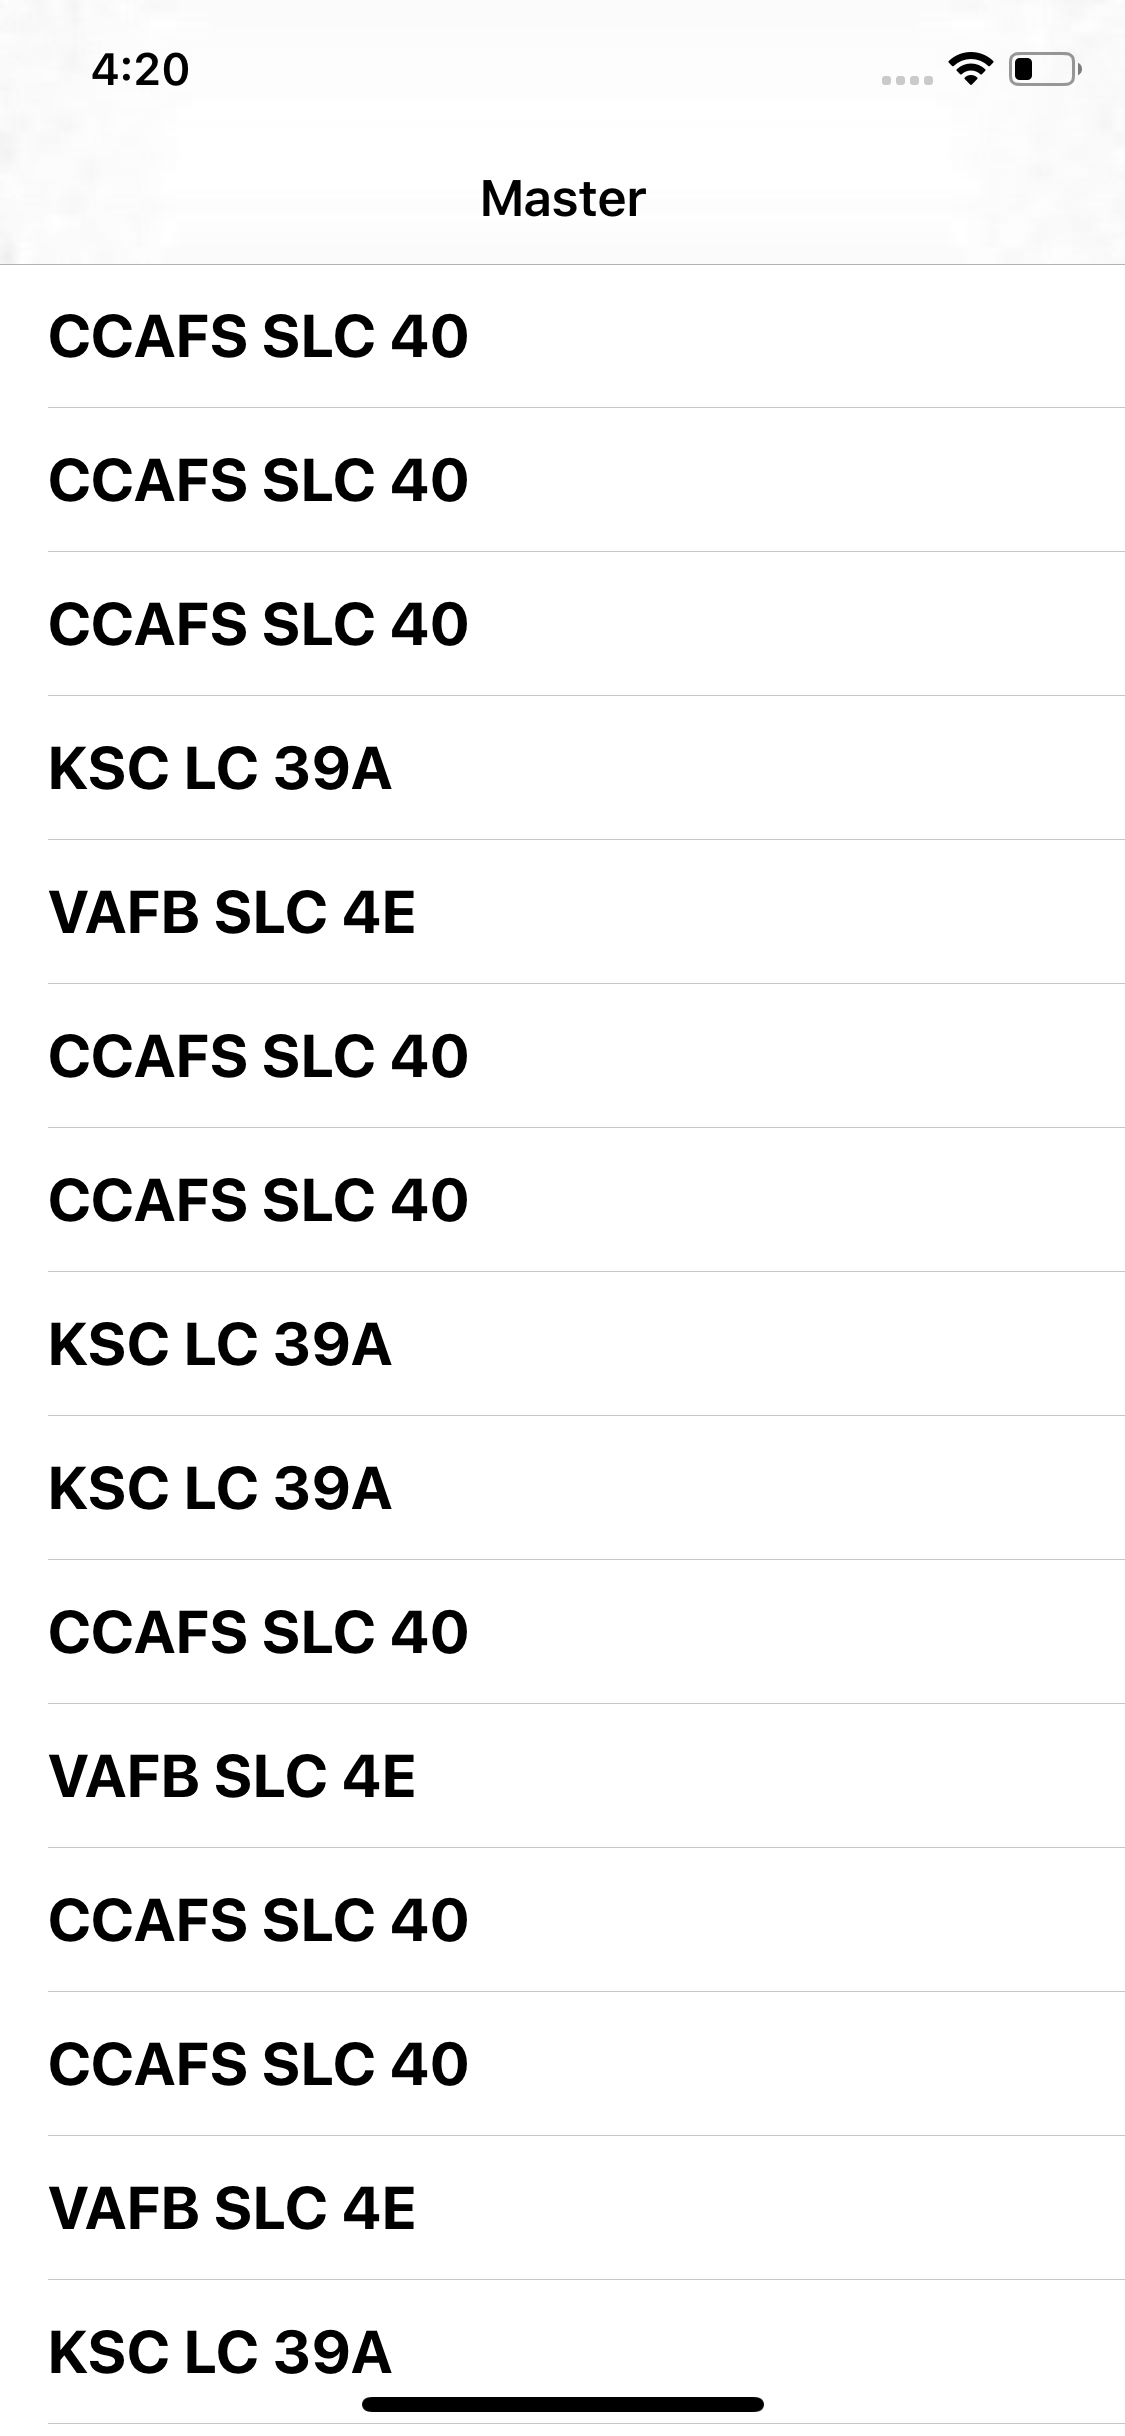
}Build and run the application. After the query completes, a list of launch sites appears:
However, if you attempt to tap one of the rows, the app displays the detail with the the placeholder text you can see in the storyboard, instead of any actual information about the launch:
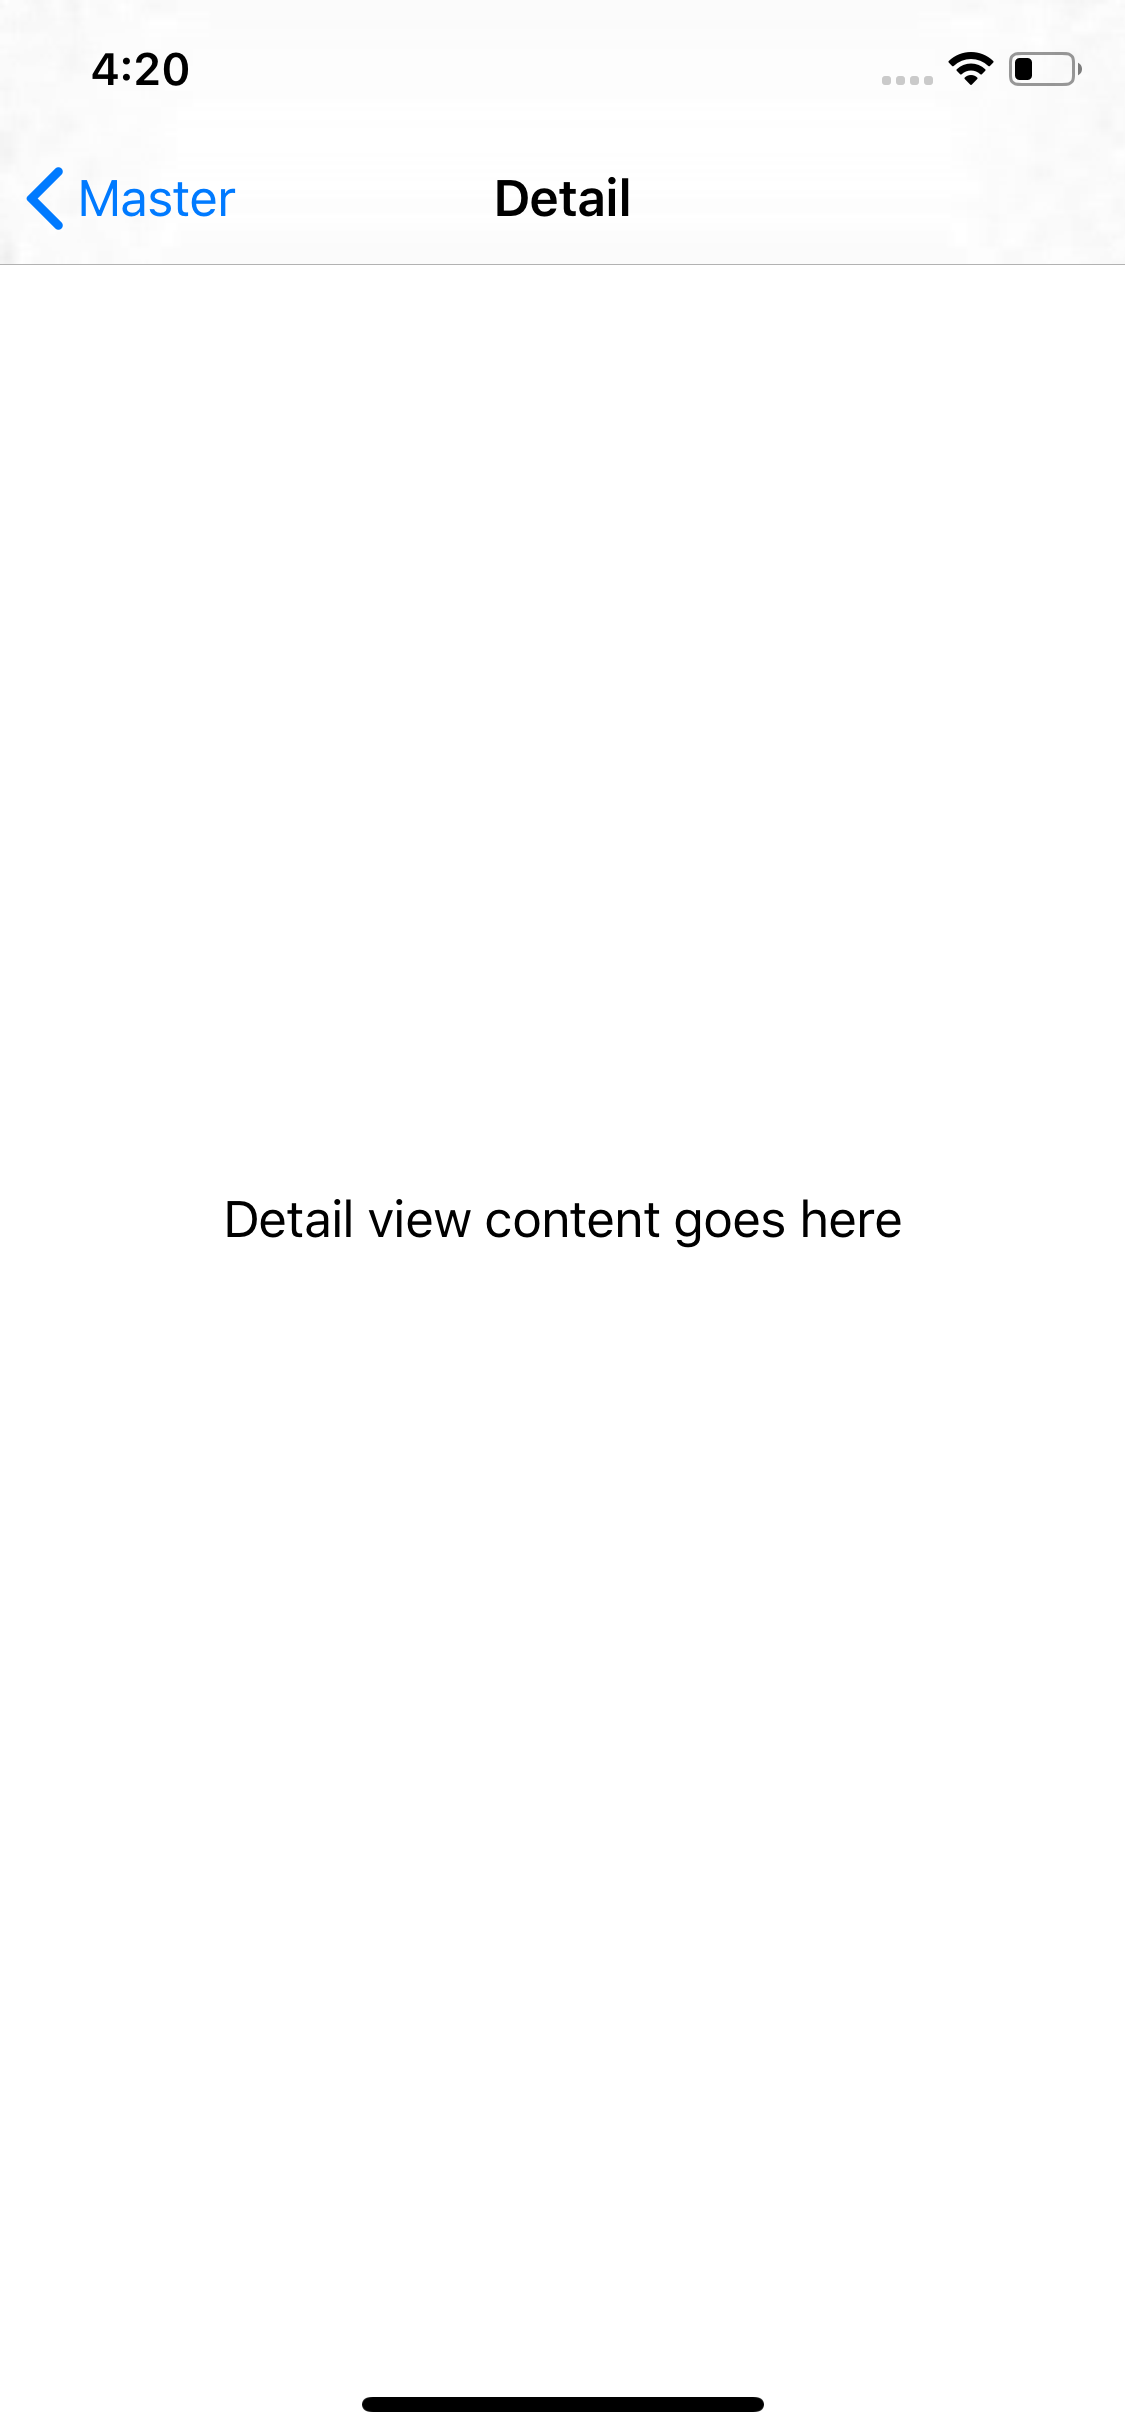
To send that information through, you need to build out the MasterViewController's prepareForSegue method, and have a way for that method to pass the DetailViewController information about the launch.
Pass information to the detail view
Let's update the DetailViewController to be able to handle information about a launch.
Open DetailViewController.swift and delete the detailItem property at the bottom of the class (you won't need it).
Next, because you're going to add a property that uses a type defined in the Apollo SDK, you need to add an import statement to the top of the file:
import ApolloNext, add a new property at the top of the class:
var launchID: GraphQLID? {
  didSet {
    self.configureView()
  }
}
This settable property allows the MasterViewController to pass along the identifier for the selected launch. The identifier will be used later to load more details about the launch.
For now, update the configureView() method to use this new property (if it's there) instead of the detailItem property you just deleted:
func configureView() {
  // Update the user interface for the detail item.
  guard
    let label = self.detailDescriptionLabel,
    let id = self.launchID else {
      return
  }

  label.text = "Launch \(id)"
}Note: You're also unwrapping the
detailDescriptionLabelbecause even though it's an Implicitly Unwrapped Optional, it won't be present ifconfigureViewis called beforeviewDidLoad.
Next, back in MasterViewController.swift, update the prepareForSegue method to obtain the most recently selected row and pass its corresponding launch details to the detail view controller:
override func prepare(for segue: UIStoryboardSegue, sender: Any?) {
  guard let selectedIndexPath = self.tableView.indexPathForSelectedRow else {
    // Nothing is selected, nothing to do
    return
  }

  guard let listSection = ListSection(rawValue: selectedIndexPath.section) else {
    assertionFailure("Invalid section")
    return
  }

  switch listSection {
  case .launches:
    guard
      let destination = segue.destination as? UINavigationController,
      let detail = destination.topViewController as? DetailViewController else {
        assertionFailure("Wrong kind of destination")
        return
    }

    let launch = self.launches[selectedIndexPath.row]
    detail.launchID = launch.id
    self.detailViewController = detail
  }
}
One slightly unrelated detail: In SceneDelegate.swift, one line relies on the detailItem property you deleted earlier, which now produces an error. Replace the erroring line with:
if topAsDetailController.launchID == nil {Build and run, and tap on any of the launches. You'll now see the launch ID for the selected launch when you land on the page:
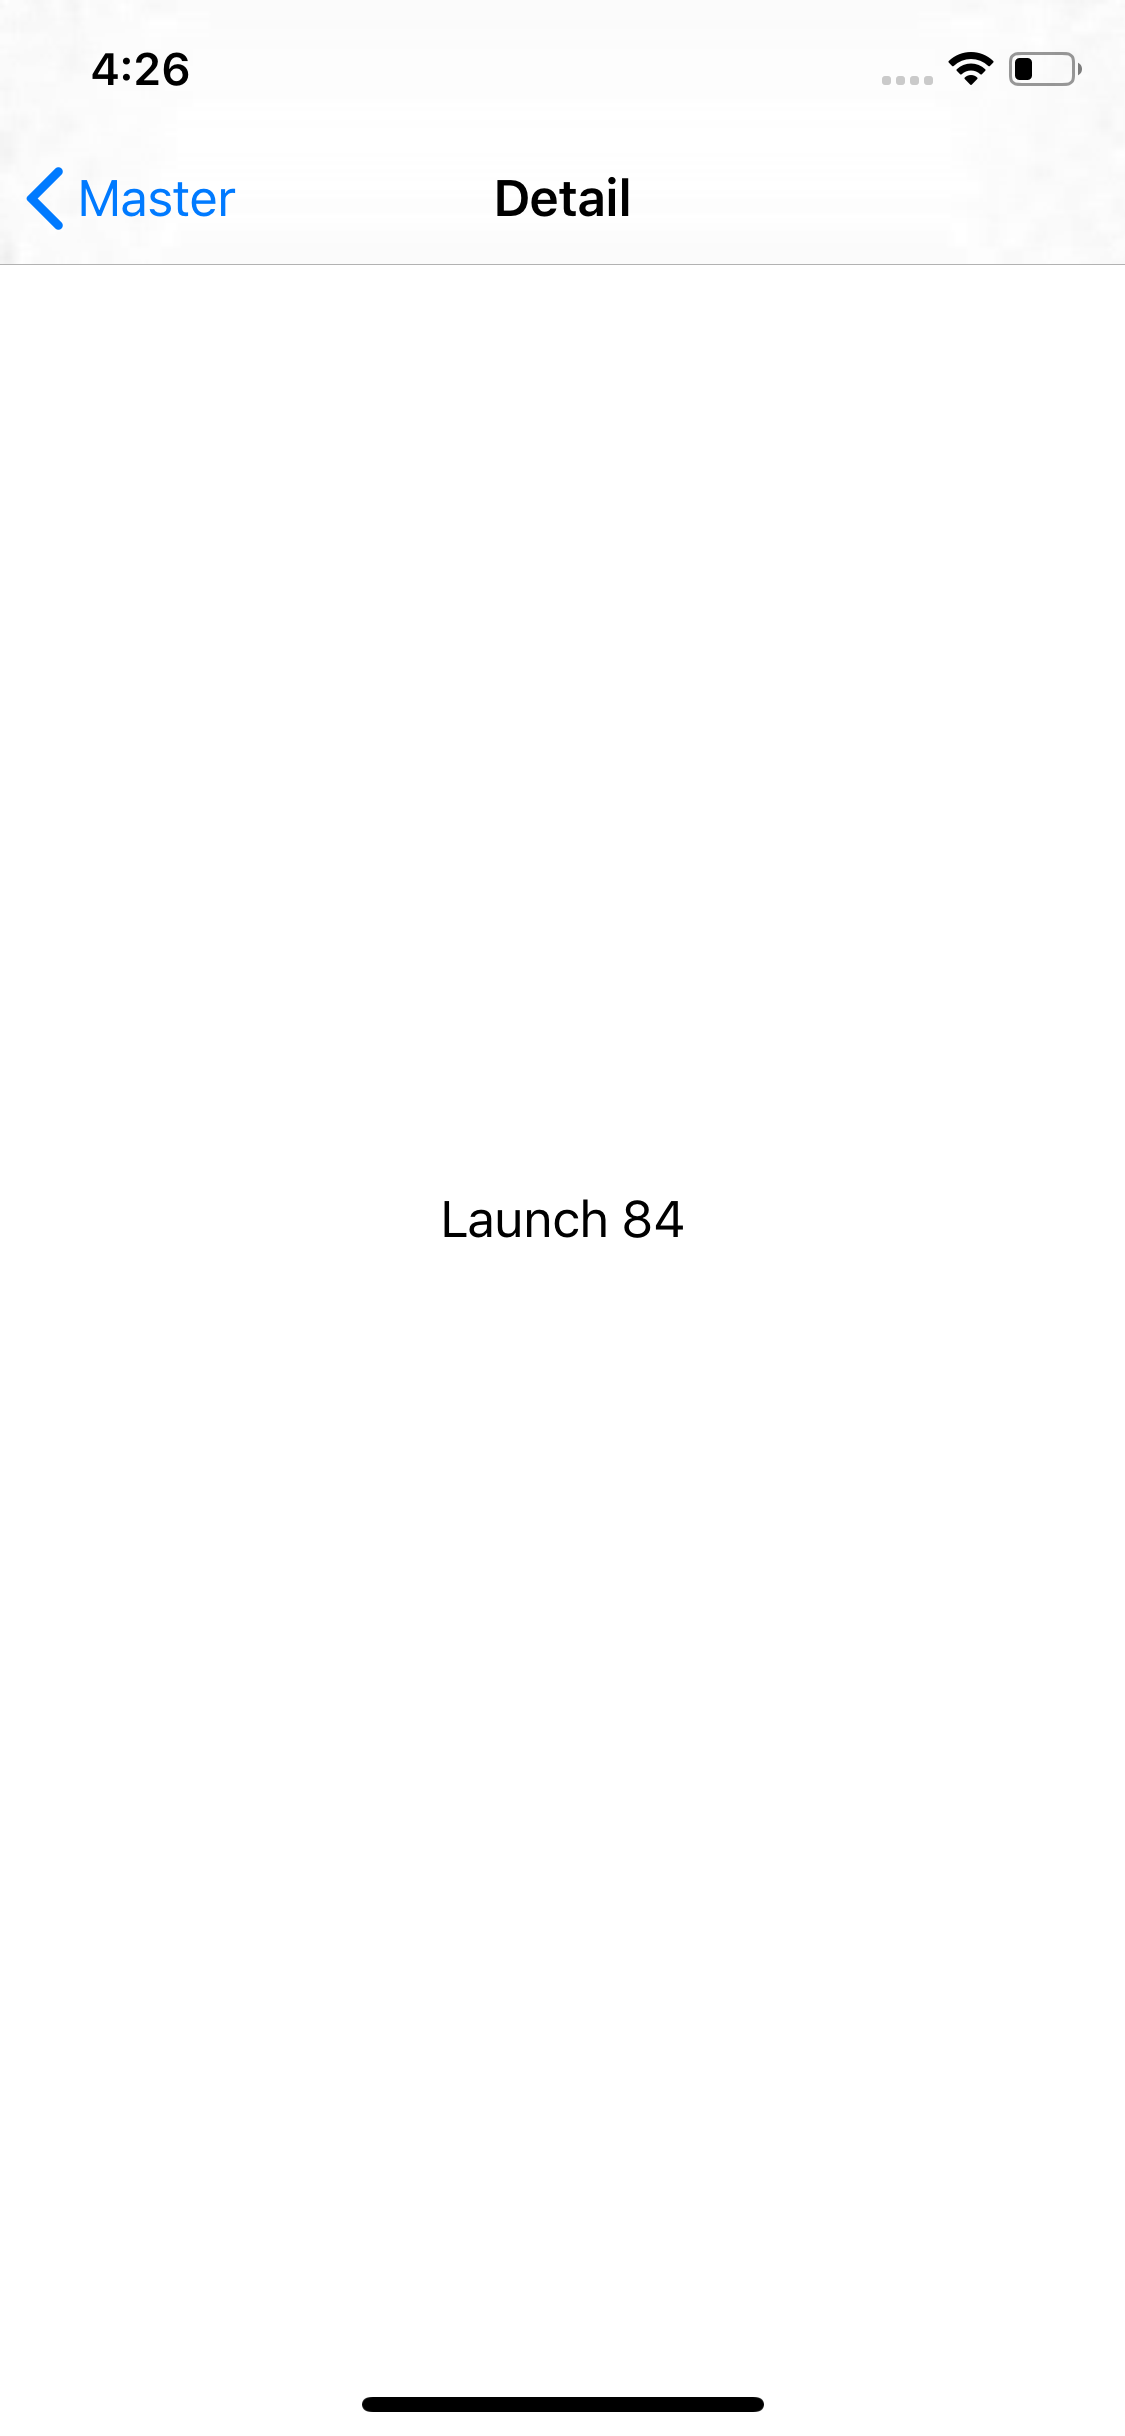
The app is working! However, it doesn't provide much useful information. Let's fix that.
Add more info to the list view
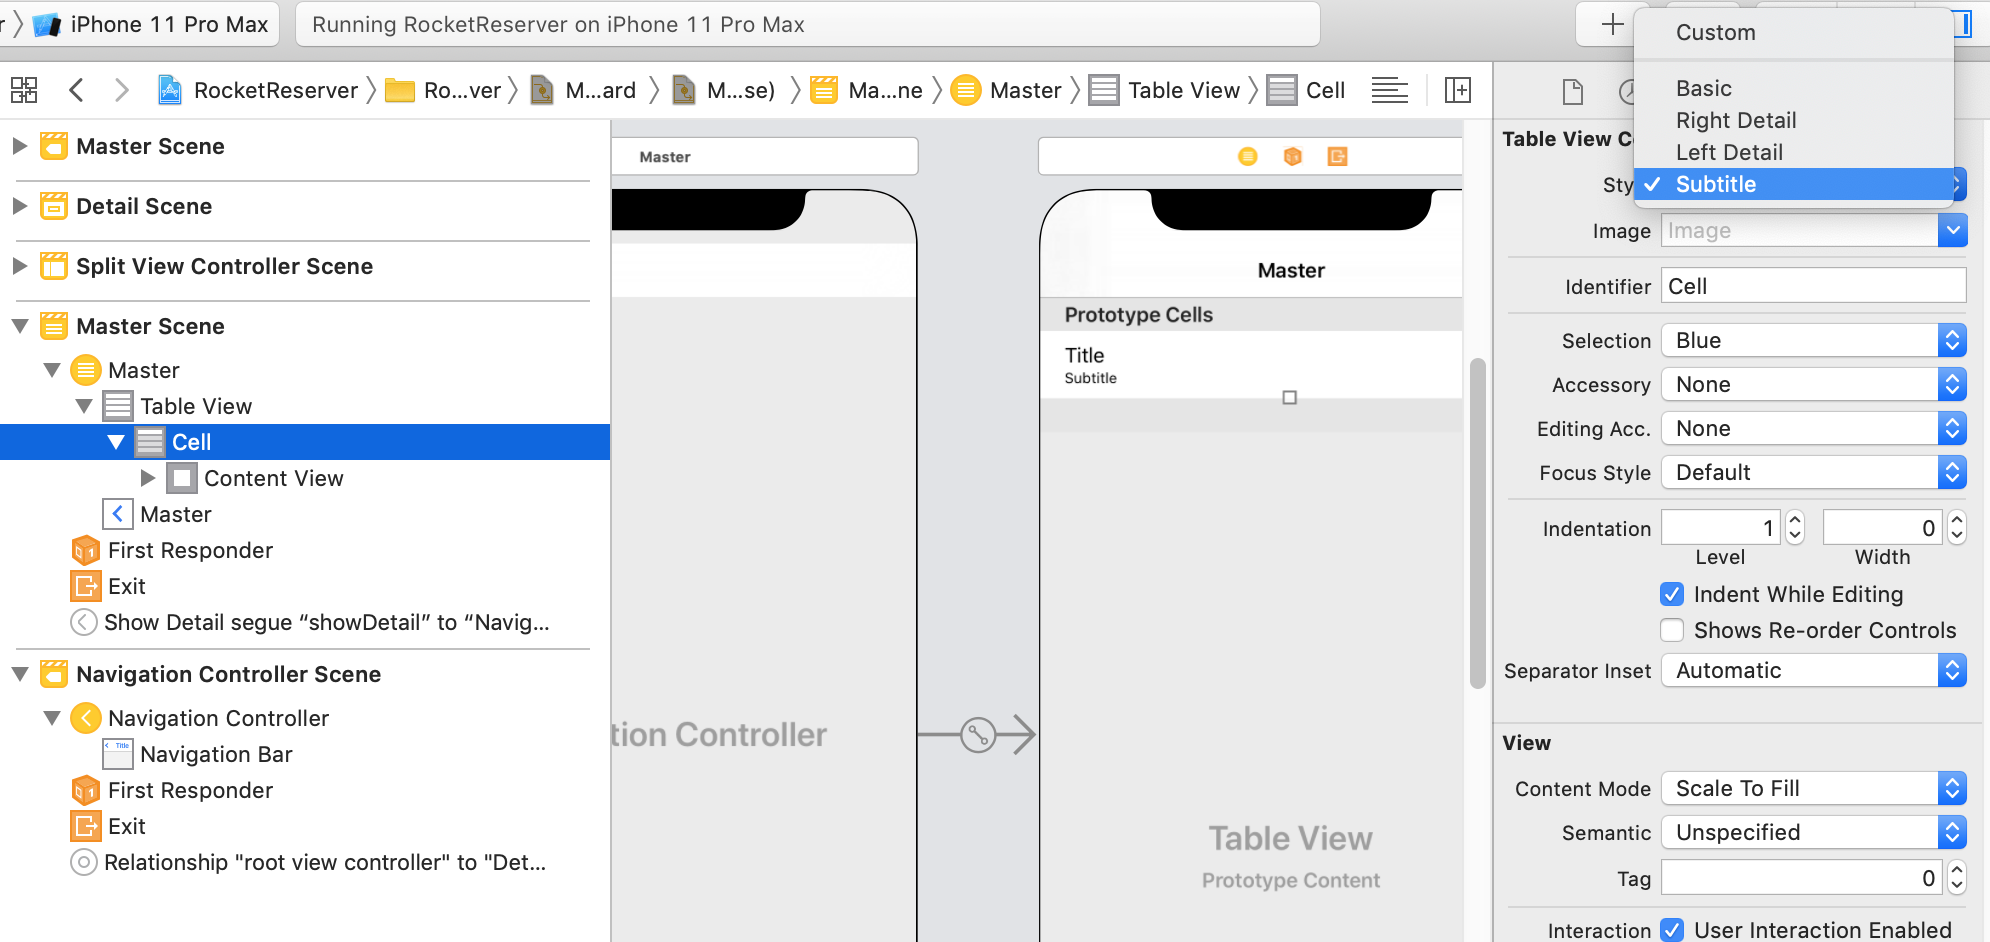
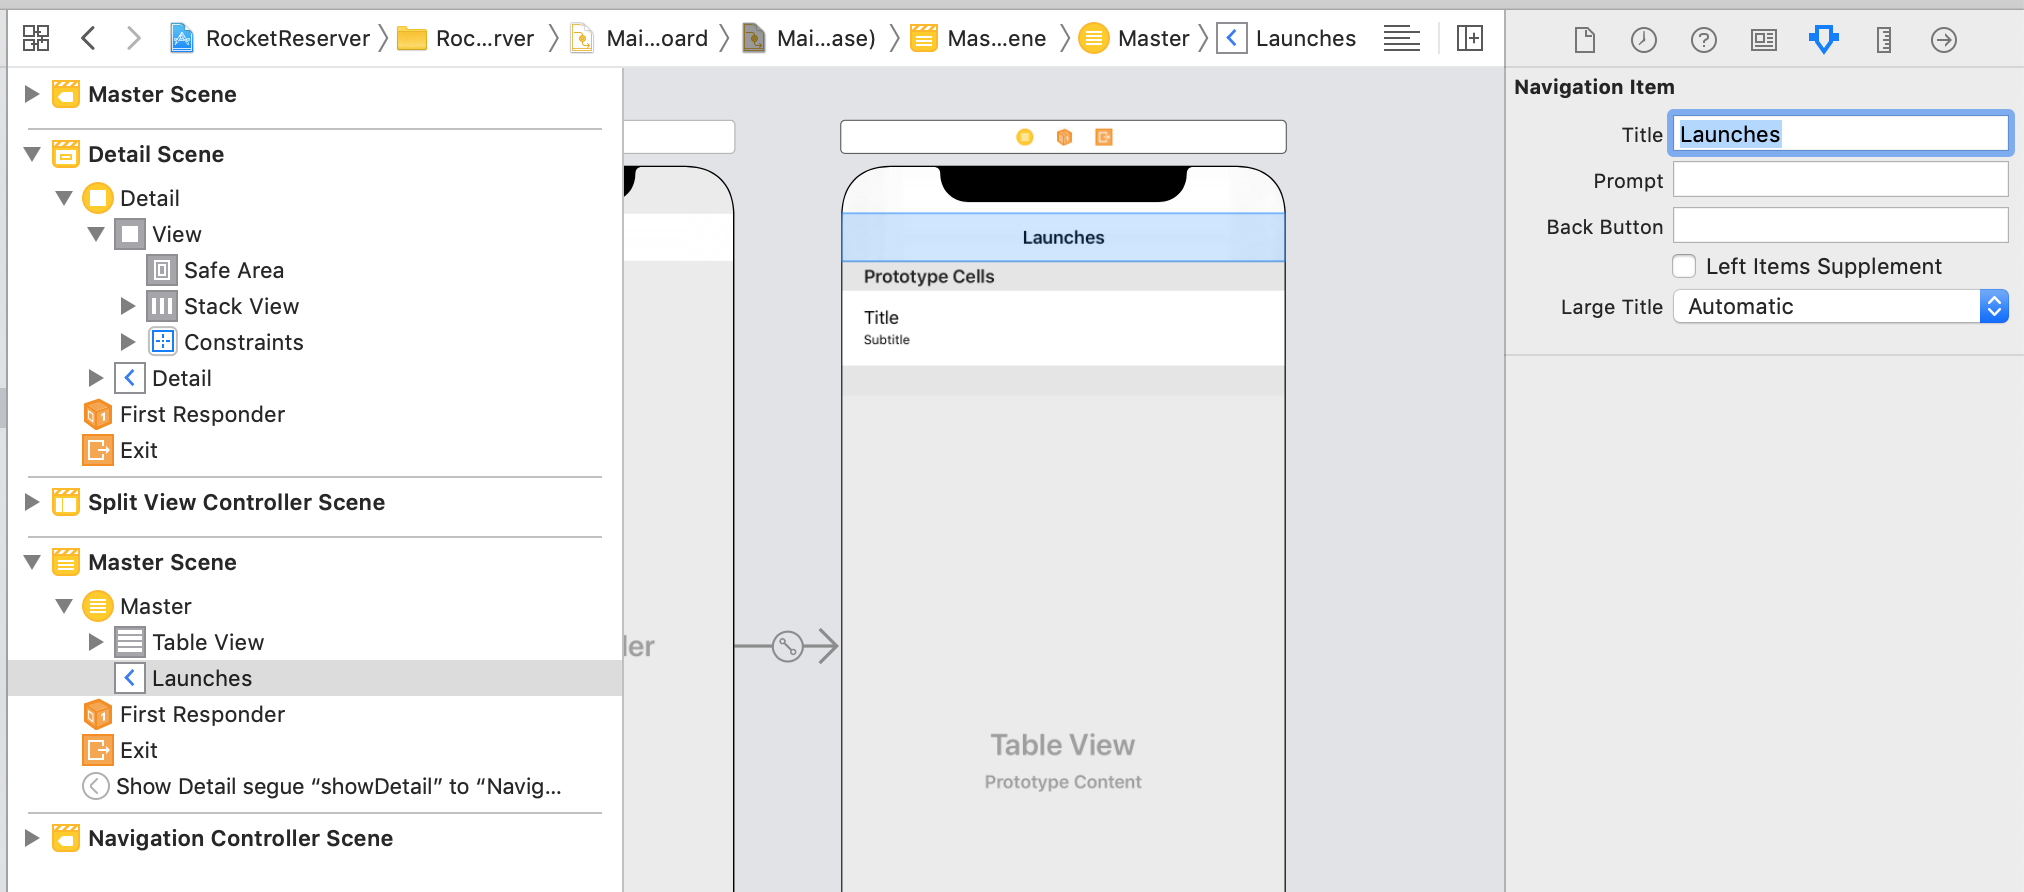
Let's take advantage of one of the built-in styles for UITableViewCell to display more information without having to do much work. Go to Main.storyboard and select the Master Scene, which includes the TableView and the default cell.
Expand the dropdowns in the left sidebar of Interface Builder until you get to Cell. Select that element, then go to the Attributes Inspector in the right sidebar of Xcode. At the top, there's a dropdown that allows you to select a style for your table view cell. Select Subtitle:
While you're here, this is a good time to give the main TableView a name that better reflects what it's actually showing. Select the navigation item and rename it from Master to Launches:
Go back to LaunchList.graphql. Your query is already fetching most of the information you want to display, but it would be nice to display both the name of the mission and an image of the patch.
Looking at the schema in GraphiQL, you can see that Launch has a property of mission, which allows you to get details of the mission. A mission has both a name and a missionPatch property, and the missionPatch can optionally take a parameter about what size something needs to be.
Because loading a table view with large images can impact performance, ask for the name and a SMALL mission patch. Update your query to look like the following:
query LaunchList {
  launches {
    hasMore
    cursor
    launches {
      id
      site
      mission {
        name
        missionPatch(size: SMALL)
      }
    }
  }
}
When you recompile, if you look in API.swift, you'll see a new nested type, Mission, with the two properties you requested.
Because missionPatch returns a URL string to an image that can be displayed, you want to make it straightforward to display an image from its URL.
To save time, go to File > Swift Packages > Add Package Dependency... and add a depenency on SDWebImage. Paste in the URL to its git repo, https://github.com/SDWebImage/SDWebImage.git, and then select the main SDWebImage from the list of package products Xcode offers you once it resolves the repo.
When SDWebImage finishes installing, go back to MasterViewController.swift and add the following import to the top of the file:
import SDWebImageYou'll use this shortly to load an image based on a URL.
Next, download this image:
![]()
Drag it into your Asset Catalog, Assets.xcassets. Name it placeholder:
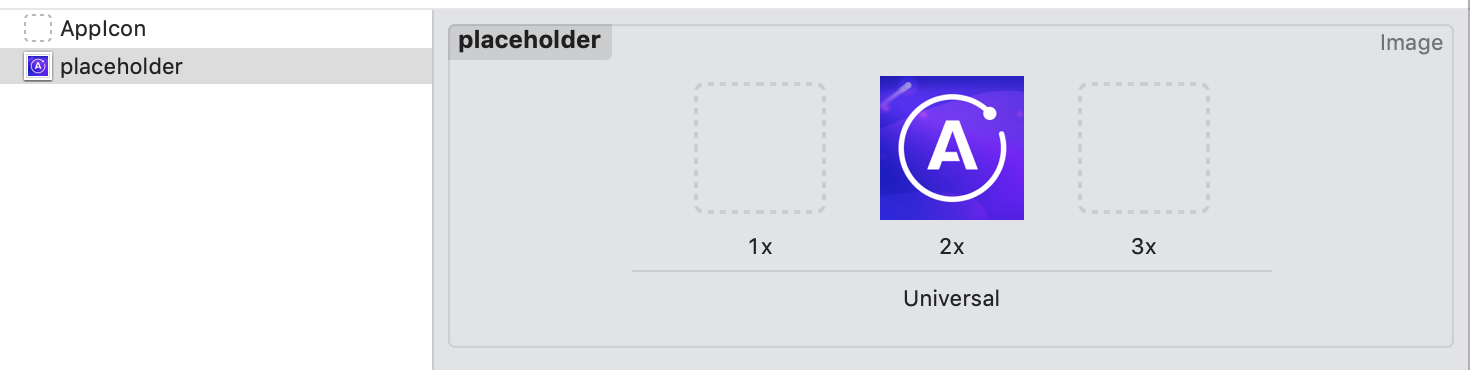
You'll use this image as a placeholder to show while the mission patch images are loading.
Now go back to MasterViewControl.swift. In tableView(cellForRowAt:), once the cell is loaded, add the following code to help make sure that before the cell is configured, it clears out any stale data:
cell.imageView?.image = nil
cell.textLabel?.text = nil
cell.detailTextLabel?.text = nilNote: In a custom
UITableViewCell, you'd do this by overridingprepareForReuserather than resetting directly in the data source. However, since you're using a stock cell, you have to do it here.
Next, in the same method, go down to where you're setting up the cell based on the section. Update the code to use the launch mission name as the primary text label, the launch site as the detail text label, and to load the mission patch if it exists:
switch listSection {
case .launches:
let launch = self.launches[indexPath.row]
cell.textLabel?.text = launch.mission?.name
cell.detailTextLabel?.text = launch.site
let placeholder = UIImage(named: "placeholder")!
if let missionPatch = launch.mission?.missionPatch {
cell.imageView?.sd_setImage(with: URL(string: missionPatch)!, placeholderImage: placeholder)
} else {
cell.imageView?.image = placeholder
}
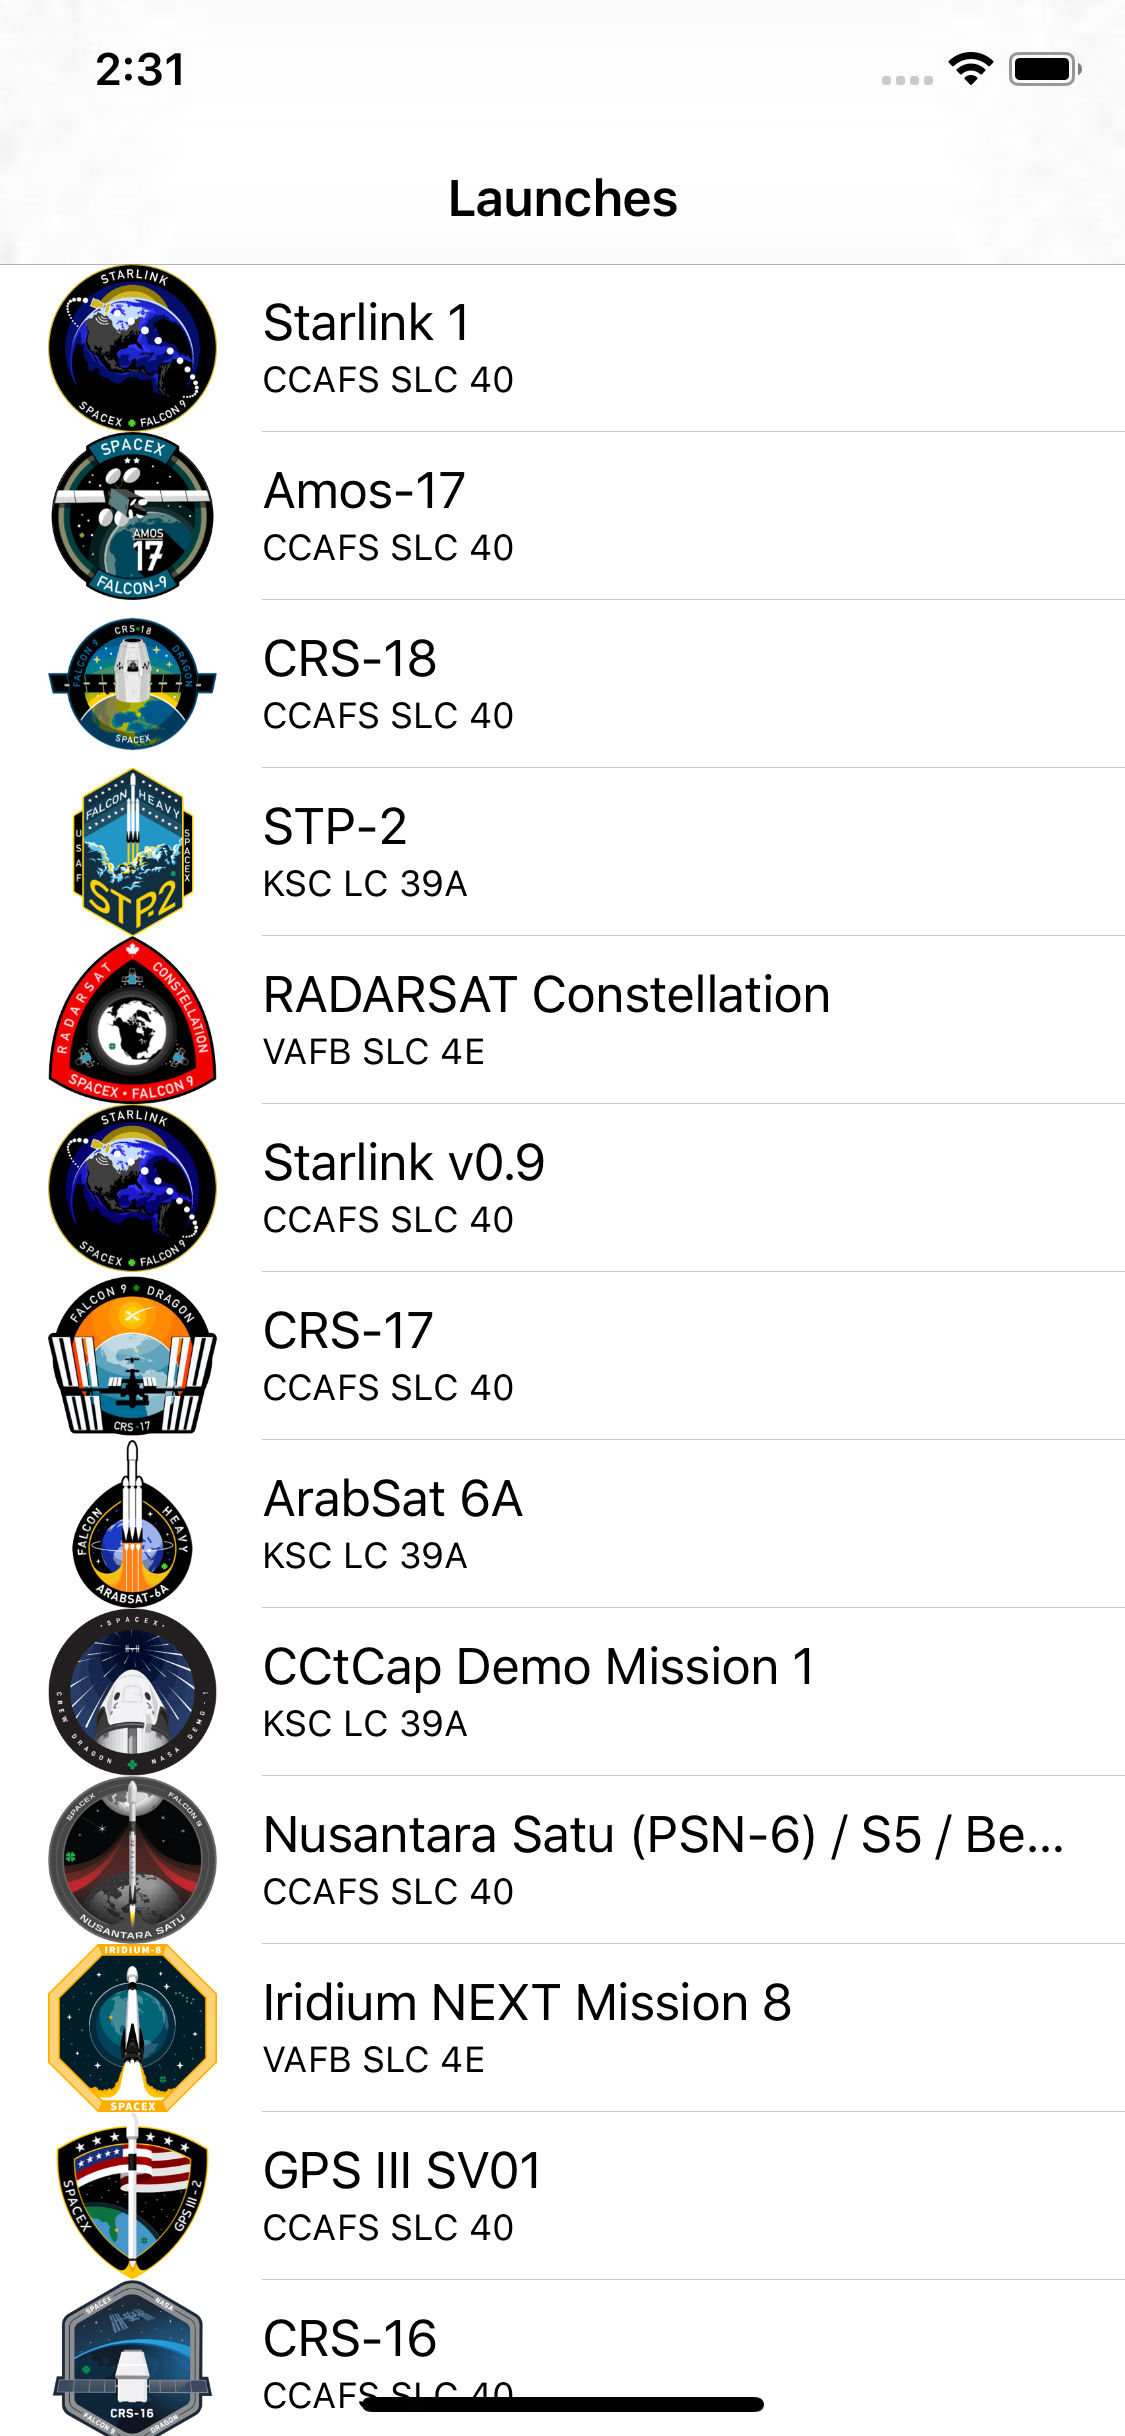
}Build and run the application, and you will see all the information for current launches populate:
If you scroll down, you'll see the list includes only about 20 launches. This is because the list of launches is paginated, and you've only fetched the first page.
Now it's time to learn how to use a cursor-based loading system to load the entire list of launches.